
Recognizing Shaft Sleeve Wear Before It Escalates
The shaft sleeve is one of the most deceptively simple components in a Goulds 3196 ANSI process pump — a cylindrical metal sleeve that slides over the pump shaft in the seal chamber area, protecting the expensive shaft from wear and corrosion at the mechanical seal or packing interface. Yet despite its simplicity, shaft sleeve degradation is a leading contributor to unplanned pump outages in chemical service. When a shaft sleeve fails, the consequences cascade: the mechanical seal loses its running surface and begins leaking, process fluid migrates along the shaft toward the bearing housing, and what began as a $100-$300 sleeve replacement becomes a $5,000+ repair involving bearings, oil seals, and possibly the shaft itself.
This troubleshooting guide covers the most common shaft sleeve failure patterns on Goulds 3196 pumps, their root causes, and the material upgrades that can dramatically extend sleeve service life.
Common Failure Symptoms
Before the shaft sleeve itself is inspected, the following symptoms often indicate developing sleeve problems:
⚠️ Quality & Compliance Assurance
All pumps and components from ANSI Pumps Pro are manufactured to ASME B73.1 dimensional specifications. Each shipment includes certified Material Test Reports (MTRs), CMM dimensional inspection reports, and hydrostatic test certificates (1.5× MAWP). 100% dimensional interchangeability guaranteed. Full material traceability from heat number to your receiving dock.
- Mechanical seal leakage at the atmospheric side — evidenced by dripping from the seal gland weep hole or visible fluid at the gland-to-stuffing-box joint. If the seal faces themselves appear intact upon disassembly, the leak path is often the sleeve O-ring or the sleeve-to-seal-rotary interface.
- Oil contamination in the bearing housing — process fluid migrating along the shaft past a worn sleeve and damaged deflector ring. The bearing oil takes on a milky, emulsified appearance or shows elevated moisture content on Karl Fischer analysis.
- Increased radial vibration — particularly at 1x running speed. A deeply grooved or unevenly worn shaft sleeve creates an asymmetric rotating mass that produces a once-per-revolution vibration signature, often misinterpreted as imbalance.
- Visible scoring, grooving, or discoloration upon disassembly — circumferential grooves at the mechanical seal rotary unit location indicate abrasive wear; blue or straw-colored heat tinting indicates high-temperature dry running; pitting indicates chemical attack.
Root Cause Analysis: Three Primary Failure Mechanisms
1. Abrasive Wear (Three-Body Abrasion)
The mechanism: Hard solid particles — catalyst fines, crystalline product, corrosion scale, or process debris — become trapped between the mechanical seal’s rotary unit O-ring / drive mechanism and the shaft sleeve surface. As the shaft rotates (typically at 1750 or 3500 RPM), these particles act as microscopic cutting tools, machining circumferential grooves into the sleeve surface. Each particle contact removes a minute amount of metal; over millions of revolutions, a groove 0.010-0.030 inches deep can develop.
Diagnostic indicators:
- Circumferential grooves — parallel, evenly spaced rings around the sleeve at the seal rotary unit position
- Groove width matches the O-ring or drive collar width
- Sleeve material has been displaced (plastic deformation) or removed (cutting), not chemically dissolved
- O-ring in the rotary seal unit shows embedded particles when examined under magnification
Corrective actions:
- Upgrade the sleeve material to a harder surface — Stellite 6 (cobalt-based hardfacing) or tungsten carbide coating applied to the sleeve in the seal running area provides a hardness of 40-60 HRC (versus 15-25 HRC for 316SS), dramatically improving abrasion resistance
- Consider installing an API Plan 32 external clean flush to the seal chamber — injecting a small flow of clean, compatible fluid at a pressure above the seal chamber pressure to exclude process solids from the seal area
- In severe cases, evaluate a dual mechanical seal with a barrier fluid system (API Plan 53/54) that completely isolates the seal faces from the process fluid
2. Mechanical Seal Installation-Induced Damage
The mechanism: The mechanical seal rotary unit is secured to the shaft sleeve by set screws (typically two or more, arranged radially or axially). If these set screws are over-torqued, they create deep point indentations in the sleeve surface — stress concentrations that can initiate fatigue cracking. If they are under-torqued, micro-motion (fretting) between the seal drive collar and the sleeve produces fine, reddish-brown iron oxide wear debris and shallow, broad wear patches. If the set screws are misaligned — not engaging in the machined dimples or on the flats if the sleeve is so configured — they can slip during operation, scoring the sleeve with axial scratches.
Diagnostic indicators:
- Deep, isolated point indentations directly under set screw locations — classic over-torquing damage
- Red-brown fretting corrosion powder around drive collar contact areas
- Axial scratches (parallel to shaft axis) — set screw slippage during operation
- Sleeve shows damage in a pattern matching the seal drive mechanism geometry
Corrective actions:
- Follow the seal manufacturer’s set screw torque specification exactly — use a calibrated torque wrench, not an Allen key “by feel”
- Ensure set screws engage in the machined dimples or on the hardened flats provided on the sleeve — never tighten onto an unprepared cylindrical surface
- When installing a cartridge seal, verify that the sleeve O-ring or gasket is properly lubricated (with a compatible assembly lubricant, not petroleum grease which attacks EPDM and Viton) and that the sleeve slides smoothly into the seal chamber bore without binding
3. Frictional Heating and Dry Running
The mechanism: Mechanical seal faces generate frictional heat during normal operation. Under proper lubrication (a stable fluid film between the faces), this heat is carried away by the pumped fluid. If the fluid film is lost — because of cavitation, loss of suction, operating against a closed discharge valve, or fluid vaporization in the seal chamber — the seal faces run dry. Face temperatures can spike to 400-600°F (200-315°C) in seconds. This heat conducts through the seal rotary unit directly into the shaft sleeve, causing localized thermal expansion, loss of material strength, and in extreme cases, heat checking — a network of fine surface cracks caused by thermal stress cycling.
Diagnostic indicators:
- Straw-colored to dark blue heat tinting on the sleeve surface at the seal location — the oxide film color is a reliable temperature indicator: light straw ≈ 400°F, dark blue ≈ 550°F
- Heat checking cracks — fine, interconnected crack networks visible with dye penetrant inspection
- Seal faces show thermal cracking (often called “heat checking” on carbon faces)
- O-ring or elastomer components show hardening, charring, or compression set from thermal exposure
Corrective actions:
- Verify pump operating point — is the pump running at or near its Best Efficiency Point (BEP)? Operation below 30% of BEP flow is a common cause of seal chamber overheating due to low fluid velocity and inadequate heat removal
- Consider a seal environmental control plan — API Plan 23 (closed-loop circulation from seal chamber through a cooler and back) provides reliable cooling independent of process flow variations
- For intermittent dry-running risk (e.g., tank emptying applications), specify a dry-running capable seal with silicon carbide vs. carbon faces and secondary sealing elements rated for the expected adiabatic temperature rise
Shaft Sleeve Inspection and Wear Limits
When a shaft sleeve is removed from service, conduct the following measurements before deciding whether to reuse or replace:
- Visual inspection: Under good lighting, examine the seal running area, O-ring seating surfaces, and set screw engagement area. Any visible pitting, grooving deeper than a light scratch, or heat tinting beyond light straw color is disqualifying — replace the sleeve.
- Diameter measurement: Using a micrometer (not calipers), measure the sleeve OD at the seal running area in at least three axial positions and two radial orientations. Compare to the original drawing dimension. Wear exceeding 0.002 inches on diameter from the original dimension is the typical limit for sleeve reuse — beyond this, the seal O-ring may not maintain adequate compression.
- Surface roughness check: The seal running surface should have a finish of Ra 0.8 μm (32 μin) or better. If a profilometer is not available, the “fingernail test” provides a rough go/no-go: a fingernail drawn across the surface should not catch on any groove or imperfection.
- Runout check: Mount the sleeve on a known-straight mandrel or the original shaft between centers. Using a dial indicator, check total indicated runout (TIR) at the seal running area. TIR should not exceed 0.002 inches. Excessive runout indicates the sleeve has been distorted — possibly from set screw over-torquing or thermal cycling — and will cause excessive seal face movement.
Material Upgrade Options for Extended Sleeve Life
| Sleeve Material / Coating | Surface Hardness (HRC) | Best Application | Limitations |
|---|---|---|---|
| 316SS (baseline) | 15-25 (work-hardened surface only) | Clean, non-abrasive, moderate-corrosion services | Poor abrasion resistance; susceptible to chloride pitting |
| Alloy 20 (CN7M) | 15-22 | Sulfuric acid and mixed acid services where 316SS corrodes | No hardness advantage over 316SS; not for abrasive services |
| 316SS with Stellite 6 hardfacing | 38-46 (hardfaced area) | Moderate abrasion with corrosion — catalyst slurry, crystallization processes | Stellite is cobalt-based; not suitable for primary coolant in nuclear applications |
| 316SS with HVOF Tungsten Carbide coating | 60-72 (coating) | Severe abrasion — mining slurries, FGD absorber recycle, ash handling | Coating can spall if substrate deforms; requires specialized grinding for finish |
| Duplex SS (CD4MCu / 2205) | 25-32 | Combined corrosion and moderate abrasion — better hardness than 316SS with superior chloride resistance | More expensive base material; limited temperature range (max 315°C) |
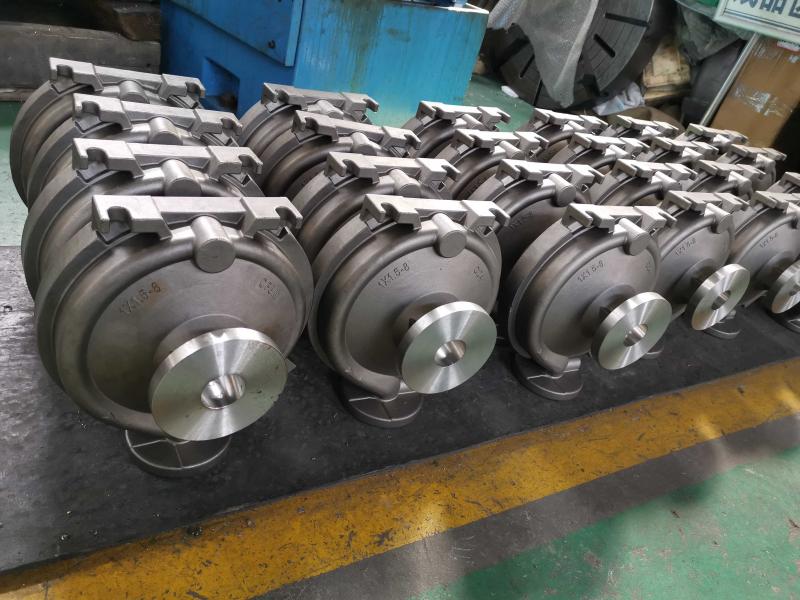
High-Quality Goulds 3196 Replacement Shaft Sleeves
When shaft sleeve replacement is indicated, the choice of replacement part has a direct impact on subsequent pump reliability. At ansipumpspro.com, we manufacture Goulds 3196-compatible shaft sleeves to the following quality standards:
- Materials: 316SS, Alloy 20, Hastelloy C-276, CD4MCu, and Titanium — with optional Stellite or tungsten carbide coating in the seal running area
- Dimensional accuracy: OD tolerance ±0.0005 inches; concentricity within 0.001 inches TIR between the seal running surface and the shaft bore; shaft bore finish honed for correct sliding fit on the pump shaft
- Surface finish: Seal running area finished to Ra 0.4-0.8 μm (16-32 μin) — smoother than the minimum requirement — to provide optimal O-ring sealing and minimize seal face hysteresis
- Factory quality control: Every sleeve is inspected for dimensional conformance, surface finish, and dynamic balance (when ordered as part of a rotating assembly). Material certifications traceable to the mill heat number are provided on request.
All our Goulds 3196 replacement shaft sleeves are 100% dimensionally interchangeable with the OEM part — same length, same OD, same shaft bore, same O-ring groove location, and same set screw dimple pattern. Installation requires no modifications to the pump, the mechanical seal, or the shaft.
To order replacement shaft sleeves or request a material recommendation for your specific process chemistry, contact our parts team at ansipumpspro.com/contact with your Goulds 3196 model number and shaft sleeve part number.
📋 Quick RFQ — No Registration Required
🔗 Related Reading
Material Upgrade Decision Matrix for Shaft Sleeves
| Service Condition | Standard (316SS) | Upgrade Option | Cost Multiplier | Life Multiplier |
|---|---|---|---|---|
| Clean chemical, <150°F | ✅ Adequate | — | 1× | 1× |
| Slight abrasives, <200°F | ⚠️ 18-24 month life | CD4MCuN | 1.5× | 3-4× |
| Heavy abrasives, any temp | ❌ Rapid wear | Stellite 6 hard-facing | 2× | 5-8× |
| Chlorides, >140°F | ❌ SCC risk | CD4MCuN or Super Duplex | 1.5-2× | 5×+ |
| Corrosive + abrasive | ❌ Dual failure | Tungsten carbide sleeve | 3-4× | 10×+ |
Recommendation: If a pump requires sleeve replacement more than once every 2 years, the upgrade pays for itself within the first avoided replacement cycle. The incremental material cost is less than the labor cost of one unscheduled sleeve change.